Add Google Web Fonts to your Blogger blog to better design than Google Web fonts better solution for this. Blogger is using web fonts for better design of your blogger blog fonts. You can find Google web fonts by clicking on the customize button in blogger templates.
How to Add Google Web Fonts to Blogger
Please follow below steps to Add Google Web Fonts to your
Blogger blog:
Step 1
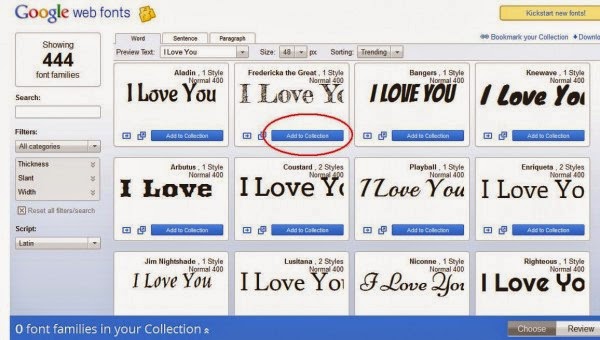
Go to Google Web Fonts and select your font which you like
to add on your blog as shown in below picture.
Step 2
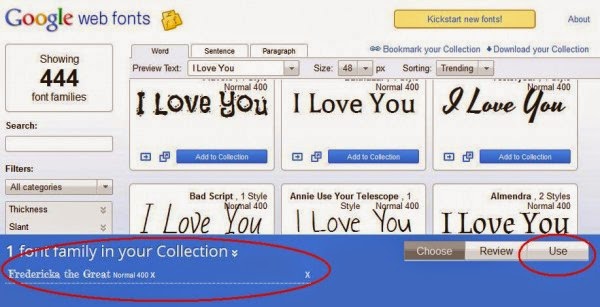
After select your font click on use button as shown in below
picture.
Step 3
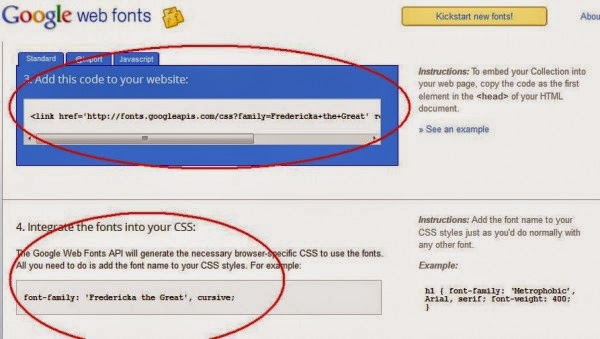
Now select html and css code as shown in below picture.
Step 4
Now Go to Blogger Dashboard.
Step 5
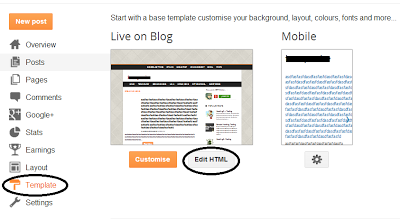
Go to Blogger Templates and click on Edit HTML button as
shown in below picture.
Step 6
Now search </head> code with the help of CTRL + F.
Step 7
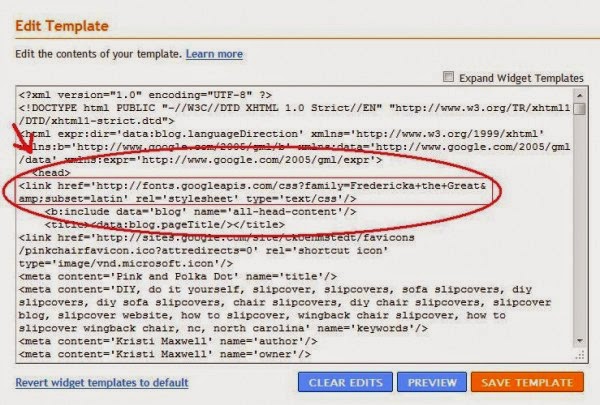
Now Paste HTML code which you select in Google Web Fonts
Before </head> as shown in below picture.
Step 8
Now search ]]></b:skin> with help of CTRL + F.


 Posted in:
5 comments:
This step by step procedure of web font in google is informative and easy to understand. intresting article and easy to understand.
I can also use blogger, but not much information about this . your article is helpfu for me. and tell me Blogger is using web fonts for better design of your blogger blog fonts. good work.
All steps is easy to understand. and helpful for me. thanks for this article. keep it up.
You can find Google web fonts by clicking on the customize button in blogger templates.
your article is helpfu for me. and tell me Blogger is using web fonts for better design of your blogger blog fonts. good work.
Post a Comment